How to Set Up and Calibrate Load Cells with the HX711?
The HX711 module appears as a basis in modern weighing systems, serving as a dangerous border between microcontrollers and load cells—sensors basic in weight and force measurement. This article explores the details of the HX711, highlighting its dual-channel operation which caters to either one or two load cells, offering flexibility in configuration. It influences a 24-bit analog-to-digital converter (ADC) and an onboard programmable gain amplifier (PGA) to ensure high-resolution, noise-minimized digital outputs from minimal analog signals. The involvement of precise calibration methods, including zero and full-scale adjustments, is highlighted to ensure accuracy in various applications from industrial scales to smart kitchen systems. The article explores the impact of environmental factors like temperature on load cell performance, detailing compensation techniques that enhance reliability. The connection setups, typical problems encountered, and troubleshooting methods provide practical insights into optimizing the functionality and durability of HX711-based systems.
Catalog
What Is HX711?
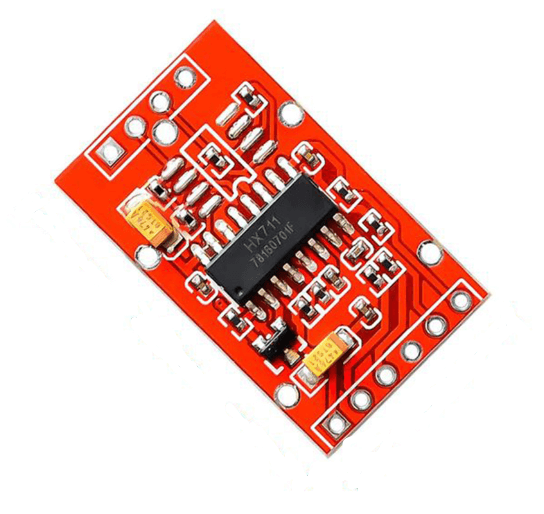
Figure 1: HX711
The HX711 is an electronic module commonly used to interface with load cells, which are sensors that measure weight or force. It features a 24-bit ADC and an integrated amplifier to convert analog signals from load cells into high-resolution digital output, guaranteeing accurate weight measurements. The HX711 supports two channels, allowing for connection to one or two load cells and providing flexibility for different weighing system configurations. Optimized for low noise, the module ensures precise weight measurements by minimizing interference. It communicates with microcontrollers, such as Arduino, through a simple serial interface, requiring only a few pins for data transmission. The HX711 operates at low power, making it suitable for battery-powered systems. Its onboard amplifier has adjustable gain, allowing customization based on the sensitivity of the attached load cell.
The tiny analog signal from the load cell is amplified by the HX711's built-in programmable gain amplifier (PGA), typically set to a gain of 128 or 64, depending on the sensor's output signal strength. This amplified signal is then fed into a 24-bit A/D converter, transforming it into a high-precision digital signal. Proper shielding and grounding of the signal line are required during this process to prevent external interference. Once converted, the digital signal is sent to the microcontroller via the HX711's serial interface. Digital filtering techniques like moving average filtering or Kalman filtering can be applied to enhance measurement accuracy. Calibration involves zero calibration to set the sensor output to zero with no weight and full-scale calibration to adjust the output to match the actual weight of a known standard object.
Connection of HX711 in Load Cell
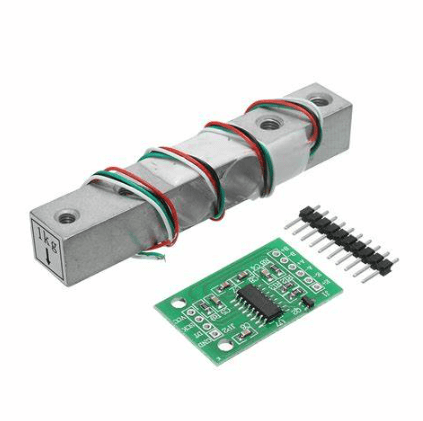
Figure 2: HX711 in Load Cell
The HX711 is designed primarily for interfacing with a load cell in weighing systems. In a typical setup, a load cell, which usually comes with four wires—red (excitation + or VCC), black (excitation - or GND), white (signal +), and green (signal -)—is directly connected to the HX711. The red and black wires are connected to the E+ and E- pins on the HX711 respectively, providing the required excitation voltage. The white and green wires are attached to the A+ and A- pins of the HX711, which handle the signal outputs of the load cell.
For power, the HX711 requires a supply voltage typically between 2.6 V and 5.5 V. The module features clock (SCK) and data (DT) pins that connect to the corresponding digital pins on a microcontroller, facilitating digital communication. After all physical connections are made, the system must be calibrated with known weights to ensure accuracy, adjusting the microcontroller's software to correlate the load cell's analog output to specific weight values. Proper grounding of the HX711 to the microcontroller’s ground, and if possible, to an earth ground, is required for minimizing noise and elevating measurement precision.
Comparison of Different Types of Load Cells
|
Feature |
Compression Type |
Tension Type |
Single-Point Type |
Bending Beam Type |
|
Principle |
Measures load applied vertically |
Measures load applied vertically |
Measures load applied in one area |
Measures load via bending force |
|
Load Orientation |
Compressive force |
Tensile force |
Any direction within a plane |
Bending or flexural |
|
Accuracy |
High |
High |
Moderate to high |
Moderate |
|
Cost |
Moderate |
Moderate to high |
Low to moderate |
Low |
|
Maintenance |
Low |
Low |
Low |
Low |
|
Output |
Electrical signal |
Electrical signal |
Electrical signal |
Electrical signal |
|
Common Applications |
Industrial scales, tank weighing |
Crane scales, material testing |
Retail scales, platform scales |
Tank weighing, industrial systems |
|
Advantages |
High capacity, robust |
Suitable for dynamic loads |
Convenient for asymmetrical loads |
Cost-effective for certain ranges |
|
Disadvantages |
|
Limited to compressive loads |
Limited to tensile loads |
Not suitable for off-center loading |
Effects of Temperature on Load Cell
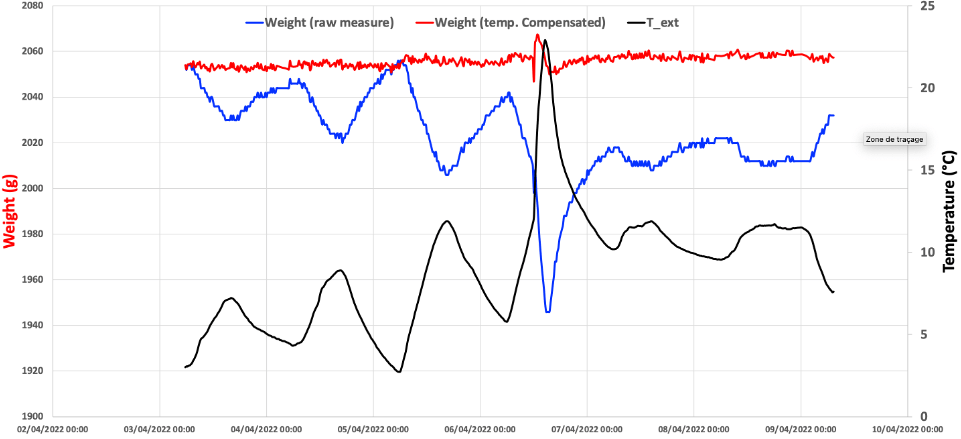
Figure 3: Temperature on Load Cell
Temperature changes significantly impact the accuracy of load cells, causing zero drift and sensitivity changes due to thermal expansion and resistance temperature coefficient of strain gauge materials. To mitigate these effects, several temperature compensation methods can be employed. One method is using thermocouples or thermistors to monitor the sensor’s operating temperature in real-time, processed by software systems to correct measurement errors. Another approach involves selecting strain gauge materials with inherent temperature compensation properties. Designing an effective bridge circuit, composed of four strain gauges, arranged symmetrically and adding temperature compensation resistors further minimizes temperature effects. Maintaining a constant temperature environment is focal for high-precision laboratory balances, and using adhesives with high thermal stability ensures firm welding points in the bridge circuit connections to avoid issues like cold welding.
Project Examples Using HX711 and Load Cell
For the smart kitchen scale, the required materials include an HX711 module, a single-point load cell, an Arduino microcontroller, and a display screen. The construction process involves securing the load cell at the scale's base, connecting it to the HX711, and interfacing the HX711 with the Arduino. The Arduino is programmed to manage the HX711's operations, continuously read weight data, and display this information on the screen. An optional enhancement is to integrate a Bluetooth module for transmitting weight data to a mobile app.
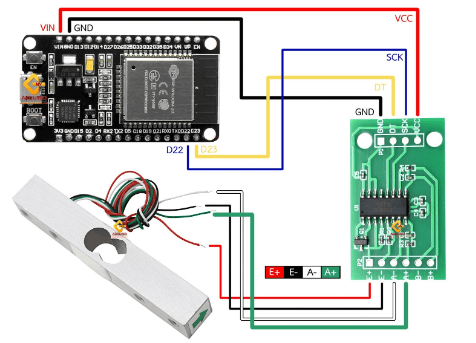
Figure 4: Load Cell with Arduino Microcontroller
For the smart trash can, the required components are an HX711 module, a single-point load cell, an Arduino microcontroller, and a notification mechanism such as a buzzer or LED light. The setup involves installing the load cell at the bottom of the trash can and connecting it to the HX711 and Arduino. The Arduino's software is tailored to monitor the trash weight and issue alerts via the buzzer or LED when the trash reaches a predefined weight. Adding a wireless module for remote monitoring and configuring the system to send alerts and weight data to a mobile application is another beneficial option.
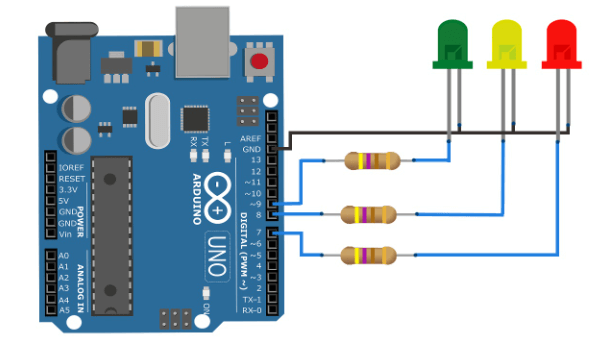
Figure 5: Arduino Microcontroller with LED Lights
Common Problems and Troubleshooting
When utilizing the HX711 module and weighing sensors, you may encounter several issues such as signal noise, zero drift, signal instability, and general maintenance challenges. To address signal noise, installing filter capacitors near the HX711’s power pin can mitigate noise from power fluctuations. Utilizing shielded cables helps isolate electromagnetic interference, which is particularly required in long-distance transmissions. Using an oscilloscope can help identify noise sources in power and signal lines, and properly grounding shielded cables further reduces interference. Zero drift issues can be minimized through regular calibration and maintaining a constant temperature environment, or by using temperature compensation devices. It's also advisable to continuously monitor and adjust for temperature changes to ensure stability.
For signal instability, inspect the soldering points on both the sensor and HX711 module to ensure they are firm. Check all wires for integrity and good contact, and use a multimeter to measure resistance at each contact point to confirm connection integrity. Regular maintenance and calibration are required. This includes checking the power supply voltage, guaranteeing secure signal line connections, and assessing the sensor’s mechanical state. Calibrating with a standard weight is focal to maintain the accuracy of sensor output.
Conclusion
The HX711 module is involved in transforming basic weight measurement systems into reliable, and adaptable technical solutions. Through a complete analysis of its design, application, and potential issues, this article not only illustrates the module's role in elevating the precision and stability of load cells but also provides a blueprint for effective troubleshooting and maintenance. Whether it's through elevating digital signal processing or qualifying the adverse effects of temperature variations, the strategies discussed herein are requisite for engineers and technologists aiming to connect the full potential of HX711 in weight-sensitive applications. Future advancements in material science and digital electronics hold the promise of further elevating the capabilities of modules like the HX711, flooring the way for more efficient, and accurate weighing systems.
Frequently Asked Questions [FAQ]
1. What is the sensitivity of the HX711 load cell?
Its sensitivity, which indicates how small of a weight change it can detect, is primarily determined by the load cell connected to it. Load cells provide a sensitivity ranging from 1 mV/V to 3 mV/V, meaning the output voltage changes by this amount per volt of excitation at full load.
2. How do you increase the sensitivity of a load cell?
To increase the sensitivity of a load cell, several steps can be taken. First, consider using a load cell that offers higher sensitivity, indicated by a higher mV/V output. Next, the quality of the signal can be improved by adopting better wiring practices and utilizing shielding techniques to reduce noise interference. Using a higher-resolution Analog-to-Digital Converter (ADC) or one with superior noise performance, such as the HX711, can be useful. The HX711 can also be arranged to operate at a higher gain setting, further increasing the sensitivity of the load cell.
3. What is the maximum sampling rate for HX711?
The HX711 module can output data rates typically up to 80 samples per second in its default mode. By adjusting the rate selection pin (RATE pin), you can switch its mode to increase the speed to 10 Hz for higher resolution measurements, sacrificing some speed for more precision.
4. Can you overload a load cell?
Yes, you can overload a load cell, which can lead to permanent damage or degradation of its accuracy. Load cells are generally rated with a maximum capacity and an overload margin, typically around 150% of their rated capacity. Exceeding this limit risks mechanical deformation and failure of the strain gauges inside the cell.
5. How do you balance load cells?
Balancing multiple load cells in a weighing system is focal for achieving accurate measurements. To effectively balance load cells, it is major to first ensure that all load cells are of the same capacity and type. They should be installed equally, and the platform or structure must be rigid to evenly support each cell. A junction box can be used to electrically combine and balance the signals from each load cell. If available, adjust the output through potentiometers to ensure an even distribution of load among all cells. After installation, it is required to calibrate the entire system to account for any modifications in the outputs of individual cells.