ATMEGA328P Microcontroller Overview
The ATmega328P microcontroller, encapsulated within the compact 8-bit AVR architecture, is central to DIY electronics and embedded systems. This article explores the ATmega328P's key features, operational characteristics, pin configurations, and applications, including its use in Arduino boards.Catalog
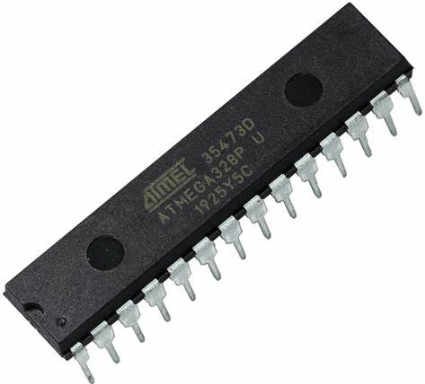
Figure 1: ATMEGA328P
Exploring the ATMEGA328P
The ATmega328P is a compact microcontroller built around an 8-bit RISC processor, known for its efficiency and reliability. Its small size and low power requirements make it ideal for projects where space and cost are limited. Despite its simplicity, the ATmega328P delivers strong performance and dependable operation, making it a popular choice, especially in DIY electronics.
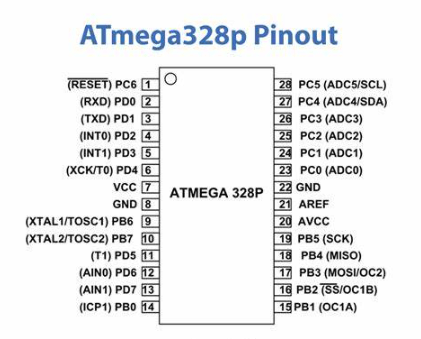
Figure 2: ATMEGA328P Pinout
ATMEGA328P Pinout and Configuration
The ATmega328P microcontroller is housed in a compact 28-pin package that supports a wide variety of input/output (I/O) functions, making it suitable for many different applications. It features 14 digital I/O pins, six of which are capable of PWM (Pulse Width Modulation) output, and another six dedicated to analog inputs.
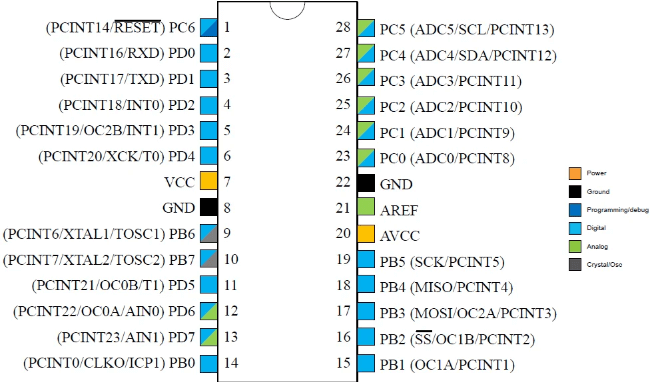
Figure 3: Detailed Pin Functions
Each pin on the ATmega328P has been carefully designed to serve multiple roles, which increases its flexibility in various projects. For instance, the PC6 pin normally acts as a RESET pin but can be reconfigured to function as a standard digital I/O pin by enabling the RSTDISBL Fuse. This dual-role setup is a common feature in the pinout. Similarly, PD0 and PD1 are primarily used for USART serial communication, but they also play a major part in the microcontroller’s programming. The power supply pins (VCC and GND) ensure stable operation, while the clock pins (XTAL1 and XTAL2) connect to an external crystal oscillator for accurate timing. Pins used for analog-to-digital conversion (ADC) facilitate precise readings from analog sensors, further expanding the microcontroller’s versatility. The multi-functional nature of the pins allows the ATmega328P to handle a range of operations, from generating pulse signals to communicating with external devices.
The ATmega328P operates across a voltage range of 1.8V to 5.5V, powered through its VCC and GND pins. The XTAL1 and XTAL2 pins connect to external clock sources, typically using a crystal oscillator to maintain accurate timing for operations. For analog-to-digital conversions, the AVCC and AREF pins are used; AVCC provides a stable voltage to the ADC system, while AREF supplies a reference voltage that ensures accuracy when converting analog signals to digital values. The RESET pin is particularly useful during development, allowing quick restarts of the system when required. It is often used in debugging to test system functionality and make sure that the microcontroller can reboot cleanly, which helps streamline the troubleshooting process during software and hardware development.
Core Features and Specifications
The ATmega328P microcontroller is built around a robust 8-bit AVR CPU and offers 28 programmable I/O lines, making it highly adaptable for digital interfacing with a wide range of devices. This flexibility allows users to connect sensors, actuators, or other peripherals with ease, making it suitable for many different types of embedded systems.
|
Features and Specifications |
|
|
Communication Protocols |
The microcontroller supports several key
communication protocols, including SPI (Serial Peripheral Interface), USART
(Universal Synchronous and Asynchronous Serial Receiver and Transmitter), and
I²C (two-wire interface). These protocols allow it to exchange data
efficiently with other components or microcontrollers, making it ideal for
tasks that require reliable communication, such as data transfer between
sensors, displays, or external memory modules. |
|
Analog Signal Processing and Timing |
Although the ATmega328P doesn’t have a
JTAG interface for hardware-level debugging, it compensates with a 10-bit ADC
(Analog-to-Digital Converter) that is spread across six channels. This
feature allows for accurate measurement of analog signals, which is used for
tasks involving sensors or variable inputs. In addition, the microcontroller
is equipped with multiple timers, enabling precise control over
timing-sensitive operations like event counting, motor control, and signal
generation. |
|
Pulse Width Modulation and Power
Control |
While it lacks a dedicated DAC
(Digital-to-Analog Converter), the ATmega328P provides flexible power control
through its six PWM (Pulse Width Modulation) channels. This capability allows
users to generate variable power outputs for tasks like dimming LEDs,
controlling motor speeds, or managing other devices that require fine-tuned
voltage control. |
|
Voltage Range and Clock Speed |
The ATmega328P is designed to operate
efficiently within a voltage range of 1.8V to 5.5V, making it compatible with
both low-power and higher-powered systems. When supplied with higher
voltages, it can achieve clock speeds of up to 20 MHz, allowing for faster
processing in more demanding applications. This versatility is main for a
broad range of scenarios, from energy-efficient portable devices to more
complex, permanently installed systems. |
Utilization in Microcontroller Boards
The ATmega328P microcontroller demonstrates its flexibility and performance across several well-known microcontroller boards, including the Arduino Uno, Arduino Nano, and Adafruit METRO 328. These boards harness the capabilities of the ATmega328P to offer powerful and versatile platforms, making them suitable for a variety of projects, from simple DIY tasks to complex system integrations.
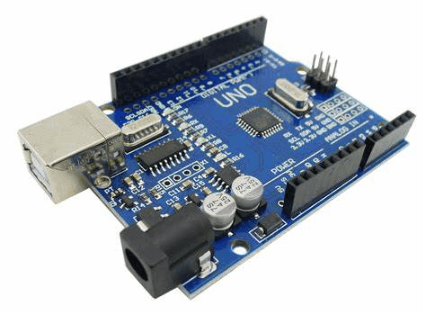
Figure 4: Arduino Uno
The Arduino Uno is well-known for its user-friendly design, making it an excellent choice for beginners and educators. It utilizes the ATmega328P’s wide array of digital and analog I/O pins, allowing users to connect sensors, actuators, and other peripherals easily. This board serves as a solid introduction to electronics and programming, enabling users to experiment with a range of projects, from basic circuits to more involved applications. Its simplicity and versatility make it a go-to option for those new to microcontroller programming.

Figure 5: Arduino Nano
The Arduino Nano emphasizes the compact size of the ATmega328P without compromising its processing power. This small yet powerful board is perfect for projects where space is limited, such as wearable devices, portable gadgets, or any application that requires a minimal footprint. Despite its size, the Nano provides the same core functionality as the Uno, making it ideal for advanced users looking to embed microcontrollers in compact environments.
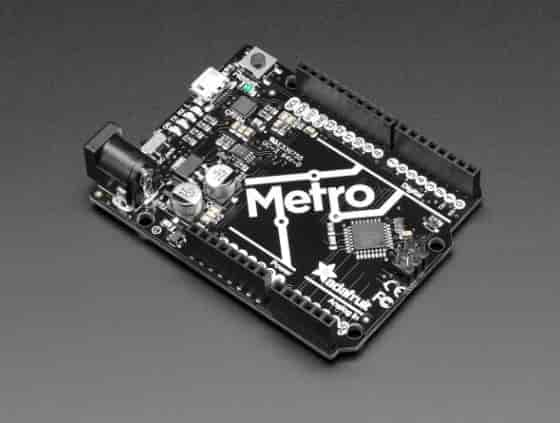
Figure 6: Adafruit METRO 328
The Adafruit METRO 328 offers a rugged alternative that is commonly used in more permanent or professional installations. While it shares a similar layout to the Arduino Uno, it is designed with additional connectivity options, making it ideal for semi-permanent systems or applications that require a bit more durability.
Diagrammatic Representation of ATMEGA328P
A set of clear diagrams is suitable for understanding how the ATmega328P works.
• Pinout Diagram: The pinout diagram is one of the most significant tools for anyone working with the ATmega328P. It shows all 28 pins and explains their multiple functions, such as digital I/O, PWM outputs, and analog inputs. By visualizing the dual roles of these pins, users can plan and implement their circuit designs with greater precision, ensuring they make the most of the microcontroller’s capabilities.
• Functional Block Diagram: The functional block diagram breaks down the internal architecture of the ATmega328P. It provides an overview of the microcontroller’s key components, such as the 8-bit AVR CPU, the memory (Flash, EEPROM, and SRAM), and various peripherals like the ADC, timers, SPI, and USART. This helps users understand how the different sections of the microcontroller work together, which is used for optimizing system performance and addressing issues that arise during development.
• Connection Schematic: Connection schematics are practical guides for integrating the ATmega328P into a broader system. They show how to connect the microcontroller with other hardware components, highlighting needed details like power supply connections, signal paths, and interfacing with sensors or actuators. These schematics are especially useful during the development phase, providing step-by-step guidance to ensure all components work together smoothly.
Programming and Implementation
Programming the ATmega328P is a straightforward process, usually done within an Integrated Development Environment (IDE) like Atmel Studio or Arduino IDE. This setup simplifies the entire workflow, from writing the code to deploying the microcontroller in a variety of applications.
|
Step-by-Step Programming Process |
|
|
Environment Setup |
Begin by installing your preferred IDE,
such as Atmel Studio or Arduino IDE, on your computer. This software provides
everything you need to write, compile, and debug your program. For Arduino
users, the IDE is particularly user-friendly, offering an intuitive
interface. |
|
Code Writing |
Once your environment is set up, start by
defining the goals of your program. Write the code using the appropriate
syntax and libraries for the ATmega328P. If you’re using the Arduino IDE,
this typically involves writing in a simplified version of C/C++, with
pre-existing libraries that make working with the microcontroller easier and
faster. |
|
Compiling and Debugging |
After writing the code, compile it in the
IDE. This step checks the code for errors and converts it into a
machine-readable format that the ATmega328P can process. If any errors are
found, use the debugging tools within the IDE to troubleshoot and fix them.
This ensures the program runs smoothly when uploaded. |
|
Uploading the Code |
Once your code has been compiled without
errors, it’s time to upload it to the ATmega328P. This is done via a
USB-to-serial adapter or an In-System Programmer (ISP). This step transfers
the machine code to the microcontroller’s memory, preparing it to perform its
designated tasks. |
|
Verification and Testing |
Finally, test your program by running it
in the actual environment where the ATmega328P will be used. This may involve
interacting with sensors, motors, or other electronic components to ensure
the microcontroller is functioning as intended. Adjustments can be made if
needed to fine-tune the performance. |
Comparative Analysis: Advantages and Limitations
The ATmega328P is widely valued for its low cost and ease of use, particularly for those just starting with electronics and programming. However, it’s noteworthy to consider both its advantages and limitations to ensure it’s the right choice for your project.
Advantages
Cost-Effectiveness: The ATmega328P is highly affordable, making it an attractive option for hobbyists, educators, and professionals working with tight budgets. Its low price allows users to experiment and prototype without worrying about high costs.
Ease of Use: One of the key benefits of the ATmega328P is its integration into popular development platforms like Arduino. This makes learning to program and design circuits much easier for beginners. The straightforward setup and large community support make it an excellent starting point for those new to microcontroller projects.
Versatile I/O Options: The ATmega328P is equipped with multiple digital and analog pins, allowing it to interact with a wide range of sensors and output devices. This versatility makes it suitable for a variety of applications, from simple tasks like controlling LEDs to more complex projects involving robotics or automation.
Limitations
Limited Memory: With only 2 KB of SRAM and 32 KB of flash memory, the ATmega328P may not be able to handle applications that require large amounts of data storage or complex software. If your project involves data logging or memory-heavy functions, this could be a significant limitation.
Processing Power: Operating on an 8-bit processor with a maximum clock speed of 20 MHz, the ATmega328P isn’t built for high-performance tasks. It can struggle with computations that require more processing power or multitasking, making it less ideal for resource-intensive applications.
Scalability: While the ATmega328P is excellent for prototyping and small-scale projects, its limited memory and processing power can become a bottleneck when scaling to larger or more demanding industrial applications. If your project needs to expand, you may need to consider more powerful alternatives.
Alternatives to ATmega328P
While the ATmega328P is a popular microcontroller, several alternatives within the Atmel AVR family offer different features tailored to specific needs. These alternatives can be better suited for projects where the ATmega328P might not meet all the requirements.
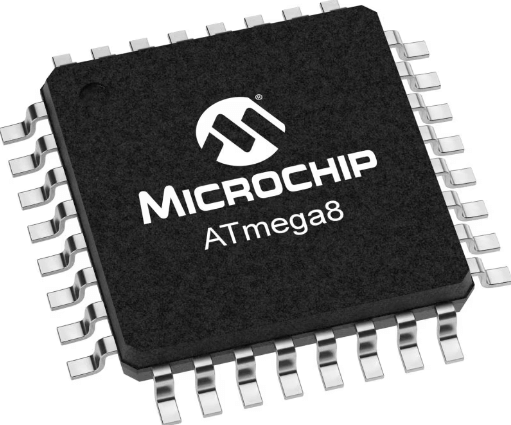
Figure 7: ATmega8
The ATmega8 is a more basic option, providing 8 KB of flash memory and 1 KB of SRAM. It’s ideal for simpler applications that don’t require a lot of memory or advanced features, such as small control systems or basic automation tasks.
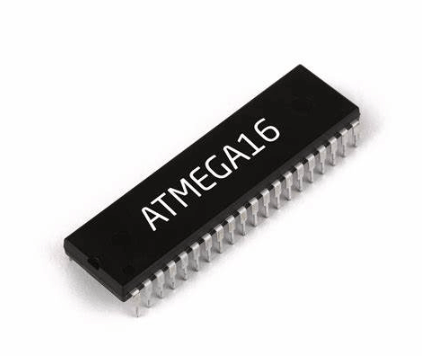
Figure 8: ATmega16
If your project needs more memory than the ATmega8 but less than the ATmega32, the ATmega16 offers a solid middle ground. With 16 KB of flash memory and 1 KB of SRAM, it provides more storage and I/O flexibility for medium-complexity applications without going overboard on features you may not need.

Figure 9: ATmega32
Offering 32 KB of flash memory and 2 KB of SRAM, the ATmega32 is comparable to the ATmega328P in memory size. However, it has additional I/O pins and more advanced peripherals, making it suitable for more complex systems that require greater flexibility in input/output operations.
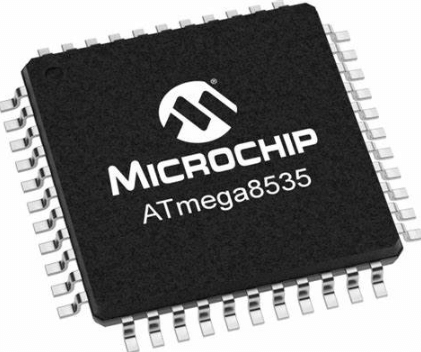
Figure 10: ATmega8535
The ATmega8535 is similar to the ATmega32 in terms of memory and functionality but comes in a different package. This can be advantageous for projects that have specific physical design constraints or require a different form factor.
Diverse Uses of the ATMEGA328P Microcontroller
The ATmega328P microcontroller is a main player in the world of embedded systems, valued for its robust functionality, affordability, and ease of use. It's a go-to choice in education, prototyping, industrial applications, and household electronics.
|
Diverse Uses of the ATMEGA328P
Microcontroller |
|
|
Educational Use |
In educational settings, the ATmega328P
is a powerful tool for teaching electronics and programming. Paired with
Arduino boards, it offers a hands-on experience that helps students
understand embedded systems practically. Whether controlling LEDs or working
with sensors, the microcontroller makes complex concepts easier to grasp,
turning theoretical lessons into practical skills. This approach not only
enhances learning but also boosts students’ confidence in designing and
building their projects. |
|
Prototyping |
For developers, the ATmega328P speeds up
the prototyping process. Its flexible I/O options and ample memory make it
easy to transition from ideas to working prototypes. Whether you're designing
wearable tech, smart devices, or automated systems, this microcontroller
allows for rapid development, reducing both time and cost in the early stages
of product creation. |
|
Industrial Applications |
In industrial settings, the ATmega328P
proves its reliability and stability. It’s used to control machinery, manage
sensor data, and automate processes, ensuring smooth operation with minimal
human intervention. Its ability to handle a wide voltage range (1.8V to 5.5V)
allows for seamless integration into different power setups, making it a needed
part of manufacturing systems that require precision and efficiency. |
|
Household and Consumer Electronics |
The ATmega328P is also common in consumer
electronics. For example, it can be found in household gadgets like coffee
machines, which it control brewing time and temperature. By ensuring
precision and reliability, it enhances user experience and makes everyday
devices more efficient. |
|
Power Regulation Systems |
In power management systems, the
ATmega328P is beneficial for regulating and monitoring energy flow. Whether
in residential power setups or renewable energy projects, it ensures
efficient and stable power distribution, contributing to energy conservation
and consistent system performance. |
Mechanical Outline and Dimensions
The ATmega328P is available in two primary package types: PDIP (Plastic Dual In-line Package) and TQFP (Thin Quad Flat Package). Each package serves different project needs based on size and application.
The PDIP package measures about 35.6 mm in length and 7.6 mm in width, with standard 2.54 mm pin spacing. This makes it ideal for breadboard use, educational kits, and projects where ease of handling and manual soldering is a must.
The TQFP package is more compact, measuring around 7 mm on each side with a 0.8 mm pin pitch. This smaller size is perfect for projects where space is limited, such as in wearable technology or embedded systems where maximizing board space is settling.
When designing a PCB, you need to account for the exact dimensions of the ATmega328P. Ensuring proper alignment of pins and leaving enough space around the microcontroller can prevent issues like mechanical interference or improper connections, both of which can affect the device’s reliability.
It's also substantial to allocate space for heat dissipation, particularly if the microcontroller will be running at higher clock speeds or operating continuously. Good thermal management helps maintain the performance and longevity of the system.
ADC Functionality and Channels
|
ADC Specifications |
|
|
Channels |
The microcontroller offers six ADC
channels, allowing it to process multiple analog inputs at once. This
flexibility is noteworthy for projects like environmental monitoring or
systems with several sensors working simultaneously. |
|
Resolution |
The ADC operates at a 10-bit resolution,
meaning it can differentiate between 1024 levels of input. This level of
detail is serious for applications that need highly accurate measurements,
such as temperature sensing or light detection. |
|
Dedicated Pins |
Each ADC channel is connected to its
dedicated pin, labeled ADC0 through ADC5. This separation helps reduce
interference between channels, ensuring that the signals remain clear and
consistent during conversion. |
|
Sampling Rate |
The ADC can sample up to 76.9 kSPS
(kilo-samples per second) under optimal conditions, enabling it to handle
real-time data processing. This is particularly useful in applications like
audio systems or real-time monitoring where quick signal conversion is used. |
Conclusion
The exploration of the ATmega328P microcontroller reveals its key role in advancing microcontroller applications across both educational and industrial landscapes. By dissecting its architectural design, pinout functionalities, and programming environment, particularly within the Arduino ecosystem, we gain insights into its capability to facilitate complex projects with simplicity and efficiency. Its robust feature set, including multiple communication protocols and a versatile ADC system, underscores its adaptability in various scenarios, ranging from simple household gadgets to sophisticated industrial systems. The comparative analysis and alternative options provided elucidate the microcontroller’s suitability for diverse project requirements, balancing limitations with performance. Ultimately, the ATmega328P exemplifies an ideal blend of functionality, cost-efficiency, and user accessibility, making it a cornerstone in the realm of embedded systems and a catalyst for innovation in digital electronics.
Frequently Asked Questions [FAQ]
1. What are the uses of the ATmega328 microcontroller?
The ATmega328 microcontroller is a versatile and widely used component in electronics, primarily known for its role in the Arduino Uno platform. It's used in applications that require automation, sensing, and control systems. For instance, hobbyists and engineers often employ the ATmega328 for developing DIY projects like weather stations, home automation systems, and simple robots. Its reliability and straightforward interfacing capabilities make it ideal for prototyping and educational purposes, where users can implement complex functions like reading sensors and controlling motors with minimal hardware setup.
2. What is the current of the ATmega328P pinout?
Each I/O pin of the ATmega328P can source or sink a maximum current of 40 mA. However, it's substantial to manage the overall power consumption carefully; the total current sourced from all pins should not exceed 200 mA to avoid damaging the microcontroller. Practically, this means being cautious about the number and type of devices (like LEDs or sensors) directly driven by these pins and often necessitates the use of additional components such as transistors or relays for higher current applications.
3. How many pins are there in the ATmega328P?
The ATmega328P microcontroller comes in a package with 28 pins. These pins include digital I/O (input/output), power supply pins (VCC and GND), analog inputs, and several specialized functions like external interrupts, serial communication, and a reset function. This range of pins supports various functionalities, enabling the microcontroller to interface with multiple peripheral devices simultaneously.
4. What are the specs of ATmega328P?
The ATmega328P is characterized by:
Flash Memory: 32 KB, ample for storing moderate amounts of code.
SRAM: 2 KB and EEPROM: 1 KB for data storage.Clock Speed: Up to 20 MHz, balancing power consumption and processing speed well.
Operating Voltage: Typically, 1.8V to 5.5V, making it compatible with a wide range of external components.
Analog Inputs: 6 channels of 10-bit ADC, enabling the microcontroller to handle analog sensors.
Communication Interfaces: Includes UART, SPI, and I2C, facilitating communication with other microcontrollers and peripherals.
5. What is the difference between ATmega328P and ATmega328?
The primary difference between the ATmega328P and the ATmega328 is in their power consumption. The ATmega328P (the "P" stands for "picoPower") is designed for applications requiring low power consumption. It has various power-saving modes, making it particularly suitable for battery-powered devices. Both models share the same core features in terms of memory, I/O pins, and functionality. The choice between the two typically hinges on the power requirements of the project, with the ATmega328P being preferable for energy-efficient applications.